Image Map

Happy Thanksgivukkah! ...Challurkey Time...

28 November 2013


Happy Thanksgivukkah!  Like I said in an earlier post, Hanukkah & Thanksgiving overlapping is a once in a lifetime event, so I wanted to do something special.  Actually, Hanukkah and Thanksgiving on the same day last happened in 1861 (but Thanksgiving wasn't established till 1868).  Hanukkah came first, and the next time it will happen is in the year 79,811!  

This past May when my husband and I got married, one of the items on our gift registry was a bread maker.  Since then we've used it 2-3 times, once or twice for a rosemary bread and once for a cinnamon sugar loaf.  Never have I attempted to make challah in my 25 years nor have I ever tried making dough in my bread maker.  This is all new and very exciting!  The reason I am sharing this with you is that, I would love to bring my bread maker into school one day and let the students measure out the ingredients, pour it all into the machine, and let it sit in the back of the room until the dough is formed.  Yes, I understand that it may be a distraction, which is why you would want to incorporate some math activity to go along with it, or manage the time so that the kids go to lunch and when they return it is time braid the challah (or make shapes) and make the egg wash that goes on top.
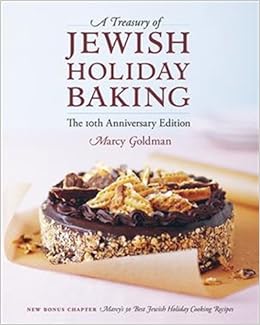
So here is what I am doing.  I am taking it up a notch!  Even though I have never made challah before, I am going to attempt a Challurkey, a challah loaf in  the shape of a turkey.  Online there are dozens and dozens of challah recipes, but since I never made it before, I asked a friend for Jewish holiday recipe book and she suggested, A Treasury of Jewish Holiday Baking  by Marcy Goodman.  The book is fantastic!  More challah recipes than you can imagine, whether you are looking for simple dinner rolls or something sweet, this book has everything.

Recipe for Friday Night Challah:

Ingredients:
1 3/4 cups warm water
2 tablespoons dry yeast
1/3 cup plus a pinch of sugar
Pinch of ground cinnamon (optional)
2 3/4 teaspoons salt
3 eggs
1/2 cup vegetable oil
6 1/2 - 7 1/2 cups bread flour

Egg Wash/Topping:
1 egg plus 1 yolk
1 tablespoon water
Sesame seeds, for sprinkling

Directions:
(You can substitute mixing bowl for bread maker on dough setting).  In a large mixing bowl, sprinkling the yeast, pinch of sugar, and the cinnamon over the water.  Stir briefly and allow the mixture to stand for a couple of minutes to let the yeast swell or dissolve.  Briskly stir in the remaining sugar and the salt, then the eggs and oil.  Fold in most of the flour to make a soft, shaggy mass.  Knead for 8 to 10 minutes by hand or with a dough hook, dusting in more flour as required to make a soft, elastic dough.

Shape the dough into a ball and place it in a lightly greased bowl.  Place the bowl in a a large plastic bag, seal, and let the dough rise until doubled, 45 to 60 minutes.  Gently deflate the dough.  Line a baking sheet with parchment paper, or if using loaf pans, generously grease either one 12-by-5-inch pan or two 9=by-5-inch pans.

For a braided challah, divide the dough into 3 sections and form it into 3 ropes about 14 inches long.  Make a traditional challah braid.  Place the bread on the prepared baking sheet.  For loaf-style challah, divide the dough into 3 portions.  Shape each piece into a ball and place the balls side by side in the loaf pan.  For two smaller loaves, divide the dough in 4, shape into 4 balls, and place 2 in each loaf pan.  Mix the egg, yolk, and water for the egg wash together.  Brush the loaf (or loaves) with egg wash and sprinkle on the sesame or poppy seeds (I chose not to do this).  Wait for about 10 minutes, then re-glaze with another coating of egg wash.  Insert the loaf pan or baking sheet in a large, clear plastic bag.  Seal the bag, and allow the dough to rise until almost doubled, 45 to 60 minutes.

Lightly grease a 12- by 5-inch loaf pan.  Divide the dough in 3 or 4 equal sections.  Shape each section into a ball. Place the balls side by side in the prepared loaf pan.  The bread can also be braided and baked free form (this is what you do for the challurkey), on a baking sheet.  Glaze the bread with egg wash twice, sprinkle on the sesame seeds, and place the loaf pan in a large plastic bag.  Let the dough rise until almost flush with the top of the pan (about 45 minutes).

Preheat the oven to 350*F.  Place the bread in the oven and bake until evenly browned, about 30 minutes for a free-form bread; 35 to 45 minutes for a loaf-style bread.  Cool on a rack before slicing.

After about 1 1/2 hours the dough is done and has been refridgerated overnight because I ran out of time yesterday.  Now after having returned to room temperature, I am ready to separate the dough into chunks and begin forming my turkey.  I divided the dough initially into 2 pieces.  Next I made 23 1/2 small balls.  The 1/2 was for the beak.  Using the other half of the dough I formed the belly and the head.  Searching the Internet as well as Pinterest I saw many pictures of how to form the Turkey shape.  I played around with the sizing of the balls, usually pulling from the belly if I needed more.  Below are some of  pictures!  Remember this was my first time ever making challah so I am very proud that I managed to make a Challurkey!

After forming the shape
Glazing twice with egg wash
Gobble Tov!

*my next challah adventure may have to be a pawllah print or a challah dog!

"Hanukkah O' Hanukkah" Pop-Out Dreidel Collage

27 November 2013

Tonight is the first night of Hanukkah and it got me thinking about all the fun crafts I've done to celebrate this holiday (* yes the dog menorah above I do own and will be lighting again this year!)  Two years ago, during my first year teaching I taught my students how to make collages using Microsoft Word.  I incorporated understanding copyright, but mostly focused on having them stay away from the copy/paste feature.  My objective for this lesson was for them to learn how to use the file/save-as feature and insert/picture from file option from the MS Word toolbar.  The reasoning behind it, as I explained to them is that in the future, if they wanted to save the project, some of the artwork may not appear (especially if saved on a flash drive), and that it is important to save the graphic somewhere that they can access later in case they need to insert it again.

The collages they created weren't Hanukkah themed nor did I want them to be.  Instead I had them fill the whole 8 1/2 by 11 page in all things that they loved, making it an "All About Me" project.  Obviously mine was covered in dogs, which was difficult because collages overlap and I didn't want any dog to be cut off, so instead I added other dog items to fill in the gaps.  This allowed me to demonstrate how to re-size, crop, and rotate in Microsoft Word.  The next step was to print, fold, draw the dreidel template (in pencil), and  make three slits in the folded paper, with a notch at the bottom.  The picture on the right shows three blue lines indicating where to cut.  At the bottom point of the dreidel is where you make a tiny triangle cut/notch.  A print out of the directions are available here.

Many of my younger students had trouble with drawing the dreidel and making the notch, so I assisted them or one of my student helpers did.  The finished products were amazing!  You learn so much from student art and the best part was that we mounted them on construction paper and they were ready in time to take home for Hanukkah!
Sample from Family Fun Magazine

Gobble Tov

18 November 2013

Shirt available @ Teddy The Dog
This year is the first ever in history that Hanukkah and Thanksgiving overlap.  Happy Thanksgivukkah!  This is definitely something to celebrate in the classroom since it is a once in a lifetime event!  I am so excited for this holiday and did some research online to find some fun activities to do in the classroom.  First off I am obsessed with Teachers Pay Teachers and found Gobble Tov! Free Thanksgiving/Hanukkah Activities (K-2) made by Happy Teacher Happy Kids.  The turkey-Menorah (menurkey) math worksheet is an excellent way to incorporate the 8 nights of Hanukkah with a math activity.  Each day at school (or at night for homework), the students will have to complete 2 problems.  One on the turkey feather and the one for that night of Hanukkah.  Keeping in mind that when we light a Menorah, we first light the middle candle called the Shamash ("helper candle") and then use that to light the rest, adding more each night.  *remember, you add the candles from right to left, but light them from left to right.  So for this assignment they should answer the math problems from left to right.
Thanksgivukkah Coloring Page

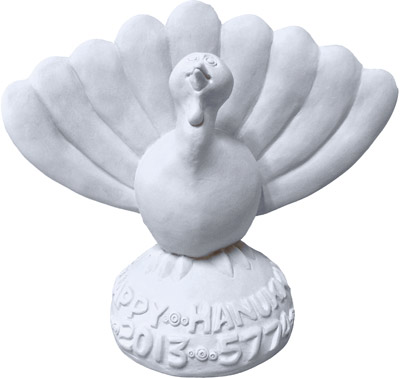
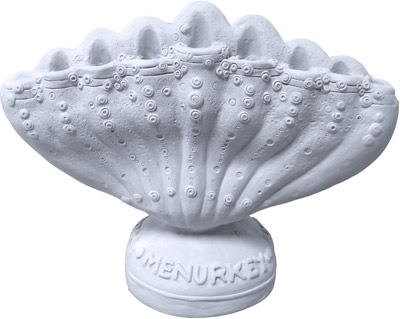
Has anyone stumbled upon the Menurkey?  It is a menorah shaped turkey designed by a 9-year-old fourth grader named Asher, from New York City.  The idea came to him after realizing that the holidays were similar, both commemorate being "thankful."  Asher, actually used Tinkercad which is a 3D modeling platform to develop the sketches for his prototype.  The menurkey idea received backing from 820 supporters, pledging $48,325 and was hosted by kickstarter.com.  To learn more, visit menurkey.com where you can order your own menurkey and decorate it however you'd like using acrylic paint.  This reminds me of when I was younger and in elementary school.  Each student in my class got to decorate their own wooden Menorah for Hanukkah.  Albeit, it was a block of wood with holes, but we loved covering it in paint, sequins and glitter.  Look out menurkey --- #glitterfeathers.


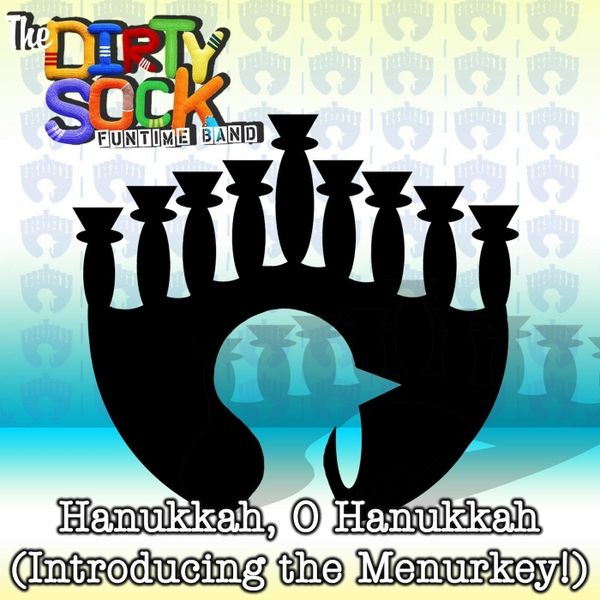
You can also download the iMenurkey app for $1.99 and light the menurkey digitally wherever you are or download the "Hanukkah, Oh Hanukkah" (Introducing the Menurkey!) song for $0.99


Foil EVERYTHING

13 November 2013

Okay so ever since I started my wedding planning last year, and all the way up to my wedding this past May I have been obsessed with foiling.  So much so that I wanted to come up with fun ways to incorporate it into classroom decor, labeling, and crafts for the kiddos.  Last year around this time for Hanukkah I decided to teach my 2nd graders how to use the cut and paste features of the toolbar in Microsoft Word, along with the shortcut keys.  Typically I save the shortcut keys for 3rd grade and up, but I knew that for this lesson it would be beneficial.

My plan for them was to type Happy Hanukkah once, highlight the text with a space, copy, and paste until they filled the page. Once they were finished, they were to hide their name (first last) in the text.  Now that they completed the actual lesson on learning to copy and paste I let them play around with changing the fonts.  Rather than printing right away, I had all my students save their work on the 2nd grade class flash drive so that I could print their work on a dreidel template that they would later cut out and mount on a foam dreidel cut-out I picked up a Target to make it really stand out.

Last step and my favorite part was to find their name in the text, carefully cover with my special foil, and run it through my laminator to transfer the metallic finish.  The students loved the finished product and we hung them for our school Hanukkah party!  I wish I took a picture or could find my sample product in my teaching storage box.  As it gets closer to the holidays and my husband and I take out all our Christmas/Hanukkah stuff (we celebrate both), I hopefully will find it and be able to share with all of you!

For now here is a silhouette of my dog Filly that I had made by Inkspot Workshop/Firehydrant Press.  It initially came in black but I learned how to gold foil using Adobe Photoshop Elements.  I'm looking forward to purchasing some note cards in ROSE GOLD foil in the future.


Welcome!

08 November 2013

Hello There!  It's already November (October flew by really fast), and after spending a countless number of hours blog-hopping from one teacher site to the next, I finally decided to join the paw-ty!  I'd consider myself a #newbie teacher with 2 years experience as an Educational Technology Teacher and Coordinator.  I've since moved on, and am looking for a position as a Kindergarten, 1st or 2nd grade teacher in New Jersey.

You are probably asking yourself, "why should I read this blog?"  I'd be doing the same thing.  Out of the thousands of teacher blogs available, what makes this one unique?  Answer: I have yet to find a dog/cat thematic teaching blog.  Personally I favor dogs, but it's important to be fair to those cat lovers out there.  So that is why I am starting this.  My classroom theme has always been dogs (imagine lots and lots of #pawprints) and I want to share with you all the ways you can create a classroom that is "something to bark about!"

Now a little about me....
  • Newlywed (husband actually proposed to me with a puppy) #perfectproposal.
  • I'm obsessed with dogs.
  • I'm a big techie.  I love all things digital and social media.  (Facebook, Twitter, Instagram, Pinterest...) 
  • "This Classroom Runs on Lots and Lots of Diet Coke"
  • I love to travel.
  • I am super organized (in my own way). *had to add that last part for my husband.
  • #starbucksaddict
  • I love washi tape, and if I could, I would monogram everything!  SGL
  • If I wasn't a teacher I'd probably be a dog boutique owner. 
Meet Filly...
Filly is my adorable shih tzu terrier that my husband gave to me when he proposed this past May.  We think he is 2 1/2 years old but the shelter we got him from was unsure.  I love all things dogs, so naturally Filly will make many appearance on my blog.

Lastly, a big thank you to Laura from Sophie & Rory design shop.  It has been amazing to work with her. I've probably been driving her nuts with all my emails #overlyexcited, but the finished product is absolutely amazing and is even better than I imagined.  She incorporated my love for dogs in a clean and simple design.  I couldn't be happier.